Thursday, January 18, 2018

Gear Review: Fun With FLIR One

It's been cold enough to freeze the tail off a brass monkey here, so I was eager to see where we're losing heat in the house. In some places I can actually feel cold air seeping in, but other cold spots are less obvious. A thermal camera would be ideal, but I'm not shelling out $$ for one. But I can borrow one from the local library.

FLIR One for smartphones
(Photo: FLIR)
Arlington County maintains a "library of things" which includes gardening tools, American Girl dolls, board games, a GoPro, and a FLIR camera.

The county lends out several FLIR One cameras to promote energy conservation, but seeing as homebrewing is a temperature-sensitive hobby, it's somewhat useful there as well.

I checked out the Android camera for one week. It only took a few moments to install the FLIR One app on my phone. Once that was done, I was scanning away. I was impressed by its sensitivity. It was able to detect the warm air ducts underneath the floors and even my footprints on the cold floor. After I swept the inside and outside of the house looking for cold spots, I took it to the brew room.

Homebrew in Infrared

The FLIR confirmed what I already knew about the brew room: It's modestly insulated with a few minor cold spots where the exterior wall is breached. This time of year, it stays at around 60°F with no forced-air circulation. The poured-concrete floor acts like a giant heat sink, so I can ferment at ale temperatures for 8-9 months out of the year without any artificial cooling.

ESB in infrared
So what does beer look like to FLIR? I trained the camera on a batch of ESB in the Spiedel. The FLIR adjusts its sensitivity automatically depending on the levels of heat it registers, so even slight differences in temperature appear stark. The Spiedel looks like a warm blob, and you can even make out the level of the beer. It's practically incandescent in infrared.

I also have a small batch of lager fermenting in my new fermentation chamber (blog post coming soon!) and I tried to take a picture of that as well. While I could see the bucket visually, it was practically invisible in infrared. The inside of the chamber and the beer were both at 55°F. The only thing I could make out was the wire for the Inkbird's temperature probe. There was basically nothing to see, so I didn't even bother to snap a picture. That's actually a good thing.

Blanketed fermenter
I also took a picture of the Spiedel with its thermal blanket over it, which is just the thin Reflectix-like bag that my Blue Apron shipments come in. It's not a great insulator, but anything to slow down the cooling is a plus. It seems to be working. You can see the warm beer peeking out below the bottom edge, but it's cooler everywhere else. Incidentally, that warm spot in the middle is me: the blanket is reflecting back my IR signature.

I have a FermWrap hooked up to my other Inkbird and the temperature set to 65°F with a 1°F heat differential (meaning it will kick on at 64°F). With the blanket, it takes several hours for the batch to cool down to 64°F, so it's doing its job.

Verdict: Useful to rent or borrow, but don't buy

The FLIR One is a neat little tool. It's not worth buying for most homebrewers, except for those that have $200 burning a hole in their pockets. But if you can borrow or rent one, it will be very useful to check the efficiency of a keezer build or fermentation chamber.

Sunday, December 10, 2017

Aging Beer The Wrong-ish Way

A home renovation put the brakes on my homebrewing for several months, save for one small batch I made for a club competition. I'd get my own dedicated brew space eventually, but I'd have to pack up everything. Normally, I would stash my kegs in a cool place, but the basement was my cool place and it was being gutted. The old beer fridge got the heave-ho, so I'd have to settle for room-temperature storage of my kegs as well as several bombers of high-ABV beers. Time and heat are the enemy of beer, so I had to be careful.

Cellaring Warm-ish

The de facto storage room was our upstairs study. While I could keep it reasonably dark, it was on an upper floor and south-facing, so it got well into the 70s F during the early-summer days. I wasn't too thrilled about it, but sadly I had no choice. I gave the kegs an extra hit of CO2 before storage as a buffer against slight leaks. Sure, they might be a little overcarbed, but that's easy to fix.

The basement was finished in about a month, so I moved the beer downstairs for somewhat cooler and more stable storage (upper 60s F). I gave the kegs a quick burp and all appeared to be holding pressure nicely. The contents still smelled like beer too, so I was confident the homebrew was doing OK.

Fast-forward to December. The brew room is functionally complete and I'm getting organized. I had three kegs of finished homebrew: a stronger Dead Guy clone, a pale ale and a mystery beer that wasn't labeled. I want to cool them down for sampling, but the new beer fridge won't fit 5gal kegs without removing all the shelves. I did say it was December, so outside they go.
Kegs in the snow
 After about 6 hours, I brought them it, hooked up a picnic tap and started sampling. How bad would these brews turn out to be?

The Dead Guy clone

This beer is an iteration on a Dead Guy clone I made for my wedding. The second anniversary brew was a bit stronger (8.2% ABV) and partial mash. It went from grain to keg in 20 days. When fresh, it was a bit boozy and had a raisiny character I didn't really care for.  This one would definitely benefit from aging, and it did.
Dead Guy clone +256 days
It poured pretty foamy at first, but a quick bleed settled it a bit. The color was still good. Not as clear as before, but the kegs had been disturbed so I wasn't worried. The boozy aroma was gone and the raisiny flavor was absent as well. I didn't detect any oxidation, but it seemed it was passed its prime. According to my brew logs, this beer was 256 days old - almost 8 months. It's peak had passed, but it was still drinkable and arguably better than it was on day 0.

Verdict: Keep it around for now, but its dump date is not far off.

Blonde Ale

The next brew was a blonde ale I brewed in April for a club competition. It was a partial mash with some rye and Nelson Sauvin hops. It would eventually be served at a summer picnic, so I went light: 4.8% ABV and roughly 20 IBUs. Grain to keg in 16 days, plus an additional 5 days of dry-hopping. 

This beer was great when fresh. It scored 41 points in the judging portion of the competition. My best score yet! But when the club-wide best-of-show rolled around 6 weeks later, it tasted noticeably different. The hops didn't pop like they did before. It finished in the middle of the pack. If it was this drastic after just a few weeks, I feared it would be undrinkable after a long cellaring.
Blonde Ale +212 days
The good news: It was still drinkable
The bad news: It was also past its prime

Carbonation was still pretty good after a short burping. This keg didn't have a lot left in it. It poured cloudy, and I can only presume that some lingering sediment was stirred up. The beer still had that vinous aroma Nelson Sauvin is known for. The flavor was more grapefruity, reminiscent of Citra, which is odd since I used Magnum as the bittering charge and a bit of Sorachi Ace at flameout. No oxidation or other off flavors detected. Nevertheless, storage had not been kind to this summer gem. 

Verdict: Dump. Not worth keeping the few pints left.

The Mystery Beer

The third keg wasn't labeled and felt about half full. I wasn't sure what I'd get when I opened the tap. Out came my base amber ale, a 5.5% ABV brew upon which I built my pumpkin-pie-spice ale. It's designed to be inoffensive, lightly hopped (~35 IBUs) and slightly malty so the added flavors stand out. It's a blank canvas; so much so that one judge in a competition said it wasn't bad, but it wasn't beer.
Base amber +296 days
This was made in late February, so it had spent 296 days in the keg. Carbonation and clarity were both good. Not a lot of aroma, but it still had a slight malty flavor. No oxidation or off flavors. Still boring. Not awful, but not at its prime either. 

Verdict: Keep for now. Might be good to cook with.

Conclusion: Colder is Better, But Time Will Always Win

Keeping beer cold is a no-brainer, but its not always possible. Beer can be - and often is - kept above serving temperature. Keeping it warm will accelerate aging. In the case of the Dead-Guy clone, that made for a better beer. If I make it again, I'll give it a few weeks of aging near room temperature. Nevertheless, too much of a good thing is often bad. All three brews are on a downward trajectory after many months of warm to slightly cool cellaring. Refrigeration would have certainly kept them longer, but degradation is inevitable.

Tuesday, July 25, 2017

Building a Brew Room - Equipment

Brewing at my house takes place in several rooms. I mash in the kitchen, boil outside on a screened-in deck (or in the kitchen if the Mrs is out of town), chill and clean in the laundry room, and cellar in the basement. My brew gear is also kept in the basement, so I wind up making a dozen or so trips up and down the stairs over the course of a brew day. It's a bit of a bother.

When the Mrs and I started talking about renovating the house, she floated the idea of converting a basement room into a brew room. We have a mostly finished basement with a guest suite, but the previous owners had converted the roughly 11'x6' bedroom into a pantry and auxiliary kitchen. 

Guest room turned pantry/cat hovel

Over time it also became the de facto cat room, where Cellar Cat's food and litter box lived. In the picture above, she's on the counter next to the fridge, likely horking down some Fancy Feast. Any cattiness in my beers is solely attributable to ... um, Simcoe!


The room already has a (too small) sink as well as 120V and 240V power supply, so it's not much of stretch to gut it and turn it into a proper brewing space. But first things first: We had to empty the basement. This meant that my brewing would have to be put on hold. All of my brew gear is piled up onto two shelving units in the upstairs home office, and the cold ingredients (hops, yeast, starters, etc) were crammed into a cooler. To be honest, I'm surprised I could fit as much in there as I did.

Brewery (and some camping gear)
in storage

Our renovation contractor's designers had never worked on a homebrew-specific space before, so they were quite eager to learn about homebrewing and what a functional brew space would require. I wanted commercial-grade (or at least commercial-ish) equipment and fixtures, but their preferred appliance and fixture supplier didn't carry anything I wanted at a reasonable price. (Much to the supplier's credit, they didn't want to sell me something at 3x the price that won't work any better than what I could buy from a big-box store.)

I wound up doing a lot of shopping on my own. It's a bit more work than just giving the builders a model number, but I'll get a quality product at a price I can stomach. Broan and Elkay make fantastic stuff, but the sink and hood will get used maybe 1-2x/month so spending $$$ on them isn't a good idea.

New Fixtures and Appliances

Exhaust Hood
I'm adding a range hood so I can boil indoors on an induction burner. Curiously, the previous owners put in an electric range, but no exhaust hood. I bought the AKDY RH-0228, which sports a 3-speed 400CFM exhaust fan (so the Mrs won't complain about the house smelling like a brewery) and 2 halogen lights (so I can see what I'm doing).  This cost me about $250 at a well-known do-it-yourself retailer.
AKDY RH-0228 range hood
Sink
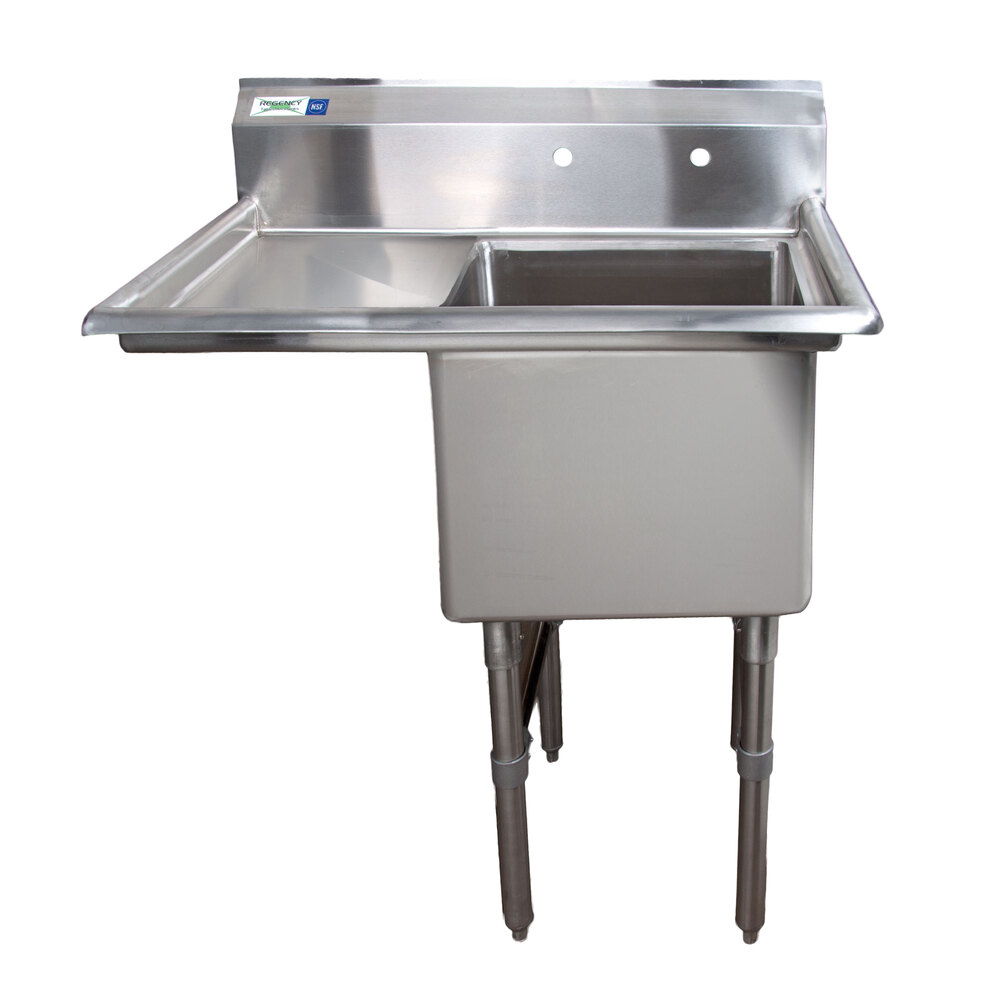
The two-basin kitchen sink is being replaced with a Regency stainless steel commercial sink. It has a 14" deep basin and is wide enough to accommodate the Mark II keg and carboy washer. The drainboard is a handy place for, well, draining things. 

Regency 600S1181818 LFT
(photo: Webstaurantstore.com)
I also bought a 8" wall-mount faucet and a twist-activated drain. One of those long dangly spray nozzles (like you see in a restaurant kitchen) would've been cool for rinsing fermenters and kegs, but probably not necessary. I also plan to put up a plastic pegboard above the sink so I can hang tubing up to dry.

Work Surfaces

For now, I have two Seville Classics stainless steel work tables. The tops are NSF certified, and the shelf is adjustable, much like the baker's racks I already have. (More on those later.)
Seville Classics Commercial NSF Stainless Steel Top Worktable
(Photo: Amazon.com)

I'd been tracking the price on CamelCamelCamel for a while. When the price hit an all-time low, I pulled the trigger. They're still in boxes, but I'm eager to get them set up. One will probably be the home for the induction burner, leaving the other for ingredient prep.

Baker's Racks

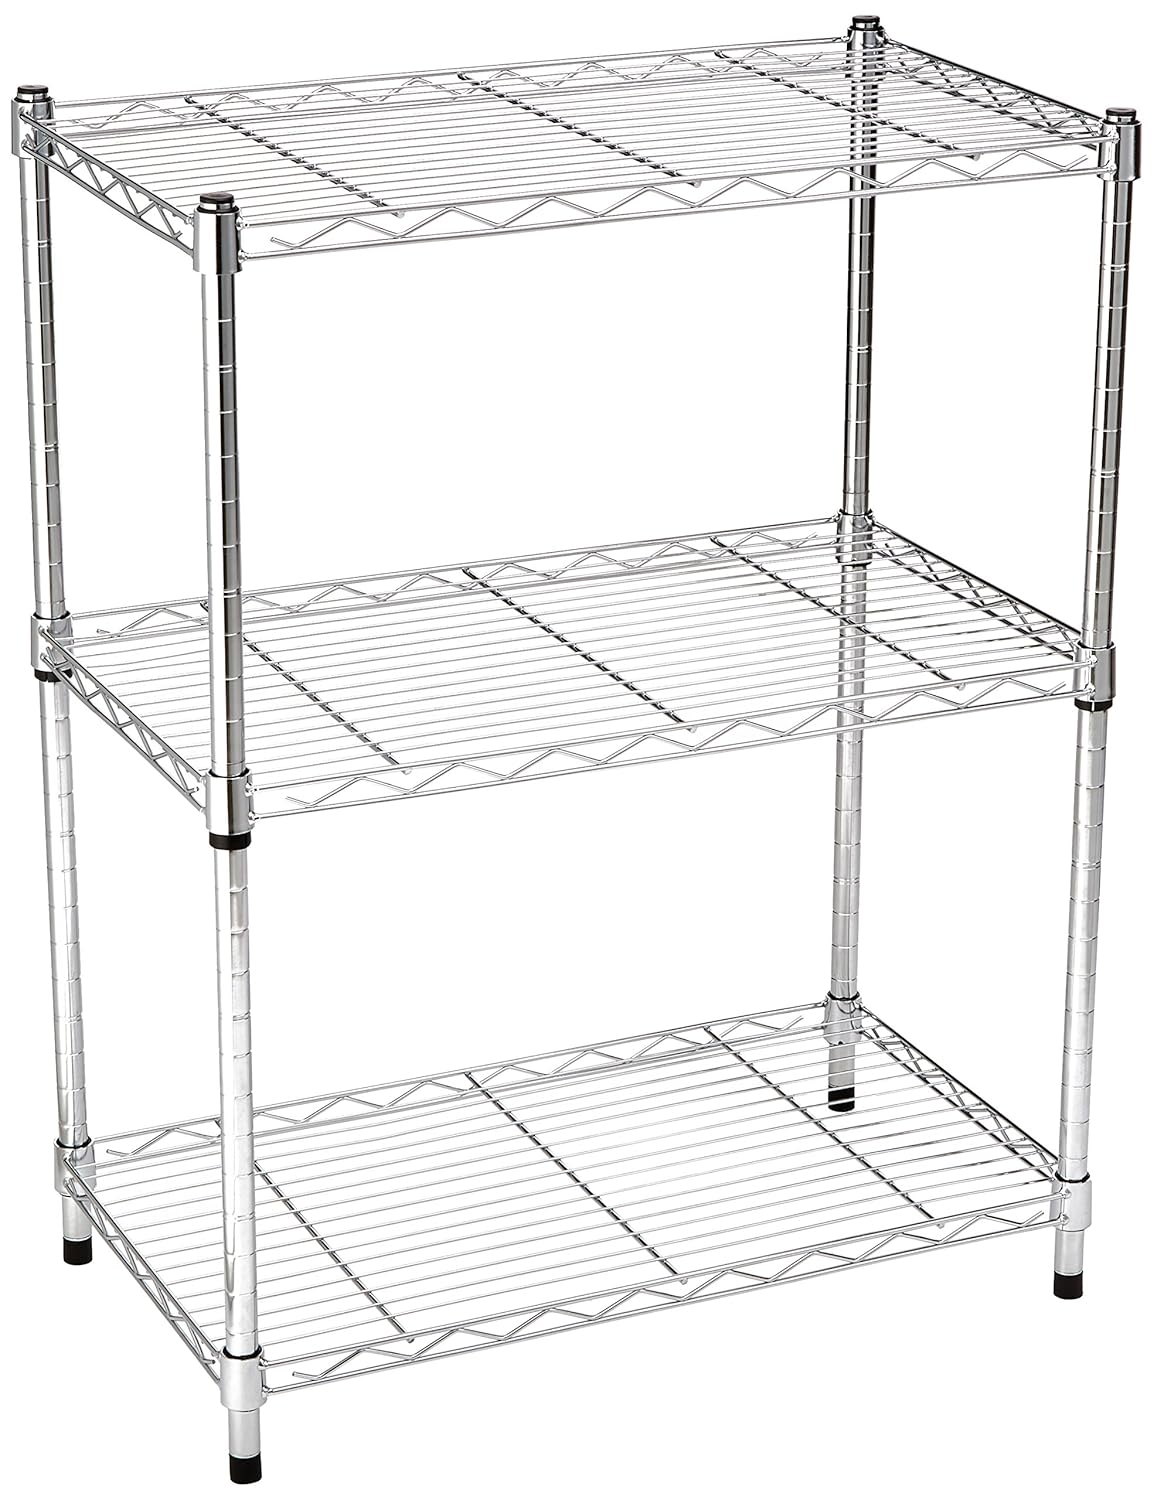
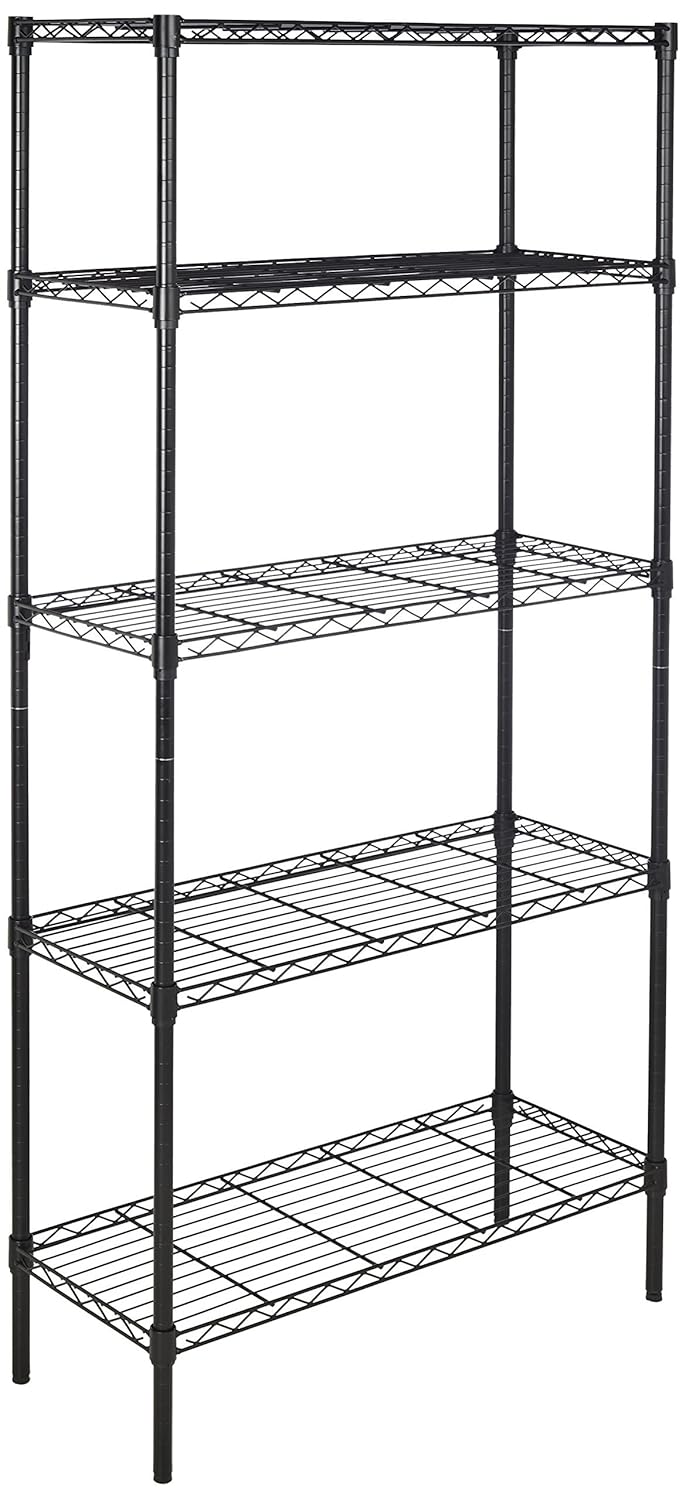
I have two racks currently: A tall one (5 shelves, ~6' high) and a short one (3 shelves, ~3' high). I bought them at Target some years ago, but Amazon has similar ones at pretty good prices. I plan to use the tall one for grain and ingredient storage. The shorter one might well go next to the sink for cleaning supplies.

3-shelf baker's rack
(Photo: Amazon.com)
5-shelf baker's rack
(Photo: Amazon.com)
These racks are pretty easy to assemble - the racks slide down the posts and are held in place by a plastic wedge-like stopper - but a bear to take apart. Gravity definitely works against you if it's standing up.

Fridge / Fermentation Chamber

I have long been wanting a fermentation chamber. A small dorm-sized fridge would be ideal, but most have a freezer compartment that takes up much-needed space at the top. More than a few people have tried to bend the compartment out of the way... and failed. The freezer is actually the evaporation coil, and handling it roughly will crack it. The refrigerant leaks out, and you're left with an expensive upright cooler.

Fortunately, someone already makes a refrigerator with the evaporation coil helpfully out of the way. The Danby DAR044A4WDD Compact All Refrigerator is exactly what it says on the box. The condenser runs down the back wall, maximizing interior space. Cut out the soda-can rack in the door and you've got enough room for a fermenter or a couple of kegs.

Danby DAR044A4WDD interior
(Photo: Amazon.com)
I've been tracking this model on CamelCamelCamel for some time. The price is pretty good currently, but I don't have a place to put it yet. I might well get a second one to store hops, yeast, etc.

Other Stuff TBD

There's still more stuff to get, but I still haven't decided what. A few things on my radar:
  • A stool or chair
  • Hooking up a small old LCD TV to cable or Chromecast
  • Amazon Echo Dot
  • A stand for my notebook computer

Sunday, June 18, 2017

HomebrewCon 2017: The Last Day

It's over.

It's finally over.

Now I can dry out.

The last day was a bit of a scamper, with two seminars to hit before one last pass at the expo floor. Then there's acquiring some of the finest liquid souvenirs from the nearest liquor store. Oh, and I had to buy and mail a Father's Day card. No pressure.

The first seminar was "Recipe Development with Dangerous Man" and their three brewers, Alxndr Jones, John Leingang and Rob Miller. It was alright. They discussed how they, well, came up with recipes. Early on, it was a lot of trial and error. Their first batch of rye beer gummed up their mash tun, so maybe 40% is too much.

The next session was "Kinda Brown, Mostly Sexy: A Semi-autobiographical Account of the Actual History and Brewing of Porters and Stouts" presented by Kris England. He's head brewer at Bent Brewstillery in town and - perhaps more importantly - a BJCP Grand Master IV judge and co-author of the BJCP 2015 Guidelines. He's also a gonzo dresser. It's hard to make out in the picture, but he's wearing a blue blazer with white stars, red trousers and black wellies with a floral pattern.
Kris England, dressed to kill you with laughter
Kris said right off the bat that he's highly caffeinated, but he learned in grad school that people won't pay attention to your lectures if you're boring. "Delivery beats content," he said. And he's right.

He went over the history of stouts and porters while occasionally badgering his friends in the audience and imploring us to drink more of the beer. (Speaking of which, he was kind enough to say at the very beginning what the beers were - Bent's Nicked and Schell's Stag Series #10 Tropical Stout - so we can get our Untapped check-ins out of the way.)

If you're a AHA member, this is one of the seminar recordings you need to watch. It's simply that good.
On a completely unrelated note, I thought this shirt in the audience was hilarious:

I darted to the expo floor to meet some folks for a Northern Brewer giveaway. Everyone got one of four beer superhero trading cards in their bag. Form a superhero team and you got a small prize (a NB logo tasting glass) and entry into a drawing for a $250 gift card and a $1000 gift card. As it turns out, forming teams was probably more trouble than most people wanted to bother with, so there weren't a lot of entries. They haven't called or e-mailed me yet, so I'm guessing I didn't win. Oh well.

I nabbed some grain samples for the gang back at the homebrew shop. Then there's the pillaging of the leftover swag bags. If you want another pen or cleaner sample, this is the time.

I made it to the post office with less than two minutes to spare, and I had to jog several blocks to manage even that. On the way back to the hotel, I detoured to Haskell's ("The Wine People!") for some beer to take home. The selection at this downtown location wasn't great, but it had more than I could fit in a duffel bag.
Did all the beer, grain, hops, and tchochke fit? As they say up here, "You betcha!"

And that was how my second HomebrewCon went. Hard to say if it was better than Baltimore, but I'm definitely glad I went. Next year's event is a bit later in June in Portland. There's a beer city for you. I might even get the Mrs and the boy to fly out ... and find other things to do.

Meanwhile, it's back to the real world, and getting my home brewery space built!

Friday, June 16, 2017

HomebrewCon 2017: Day 2

Yet another day at HomebrewCon. After the swag-o-rama and dickchimping of Day 1, Day 2 was more about the seminars.

The nice thing about this conference is that all the seminars are recorded, and they are posted to the AHA website soon afterwards. For some time slots, I had four seminars I was interested in. Knowing I can watch them all later frees me to pick one that might have a good Q&A or - more importantly - accompanying beers.

First up was a session on using dry yeast for bottle conditioning by Jennifer Helber, who set up Boulevard Brewing's quality assurance lab back in the 1990s. I never thought to add dry yeast to finished beer, but damned if it isn't a good idea. Boulevard  filters out the first yeast, then adds a different yeast for conditioning. The new yeast also helps clean up diacetyl and other off flavors.

Next was a historical presentation on molasses beer. The presenter was Frank Clark from Colonial Williamsburg in Virginia. He has a particularly cool job in that he researches food from a historical standpoint and tries to replicate them. Seeing as he works for a colonial-era living museum, he researches and brews colonial-era beer. And wears period clothing.
Molasses beer was a combo of molasses, wheat bran and hops. As it turns out, molasses and liquid malt extract have the same PPG (1.036) so this was effectively the first partial-mash beer. What's old is new again. The beer itself is cloudy but pretty tasty.

Then we got all sciencey with Rahr Malting's hops wizard, Patti Aron.
Good info on past research into hops, how IBUs are calculated, how aging can actually make hops better, and why isomerized hops don't skunk easily. Also plenty of molecule diagrams, which made a bit of sense to a guy who managed a C in freshman chemistry.

Phew! Time for beer! Before long I found the line for the Dickie's booth. Someone at the Briess booth told me the day before that were giving away work shirts. Sure, why not?
It took a while (20 minutes?), but I walked away with a navy blue Dickie's short-sleeve shirt freshly pressed with my choice of patch. They only had XL shirts left by the time I got there, but that happens to be my size (and probably a third of all convention-goers). Score.

Quick break for lunch and then another seminar on how to evaluate your beer like a beer judge. Gordon Strong gave a great presentation, and there were two beers offered (Schell's Pils and Summit Extra Pale Ale) to practice sniffing and sipping. Who knew there were eight different ways to smell beer?
One last turn of the expo floor to see what's up. Yakima Valley Hops did a HomebrewCon promo using plinko. One-pound bags of pellet hops were $20, and you could get a discount (up to 50%) depending on where the puck landed. First try stuck on a peg about a third of the way up from the bottom.

"That means I get it for free, right?"

"Ha! Not quite. Try again."

This time it landed on 3, so 30% off or $14/lb. Not too shabby.  I picked Medusa, a recent hybrid of a neomexicanus variety that was unlike anything I had. And since I hit the peg (or, more likely, they wanted to unload it) the guy even threw in an opened bag of Loral that had been on the counter as a sample. It weighs about as much as the sealed bag, so I'll call it 2lbs for $14. I'll vacuum-seal and freeze the Loral when I get home, but at 10.2% alpha it will have enough punch for some autumn brews.

Friday's catch
After dinner I braved Club Night. Only one other guy (that I know of) is here from my club in VA, so this might be short. I managed about an hour and a half, trying a few tasty-looking beers. Props to clubs with Randalls and beer engines.
It's a pig. Bourbon barrel stout
comes out the butt tap. 

M.A.S.H. with an IPA line split in two.
One fed into the Randall. Very tasty.

SMASH with a pretty righteous
slide-in reefer unit converted to
a trailer.
I may have gotten a shot (actually a syringe) of Maker's Mark from a guy dressed like a doctor. He looked legit. :D

HomebrewCon 2017: Day 1

Day one of HomebrewCon began quietly for your humble blogger. The morning sessions were for industry types, so I had a leisurely breakfast and wrote the prologue post before heading over to hit the expo floor. I learned from last year that there's a lot of swag handed out and many good products to check out, so I made a point to spend several hours checking out the booths. I work part-time at a homebrew shop so I was also on the lookout for products that might do well there. Just because I wouldn't buy some gizmo doesn't mean our customers won't.

I picked up the swag bag and it was already heavy. This year there's a commemorative beer by Surly called Walezbrah. It's an auburn-colored beer (7.5% ABV) and maded with an oaked pale wheat wort. "Whalezbrah! is tart, funky, wheaty, and contains waves of weird wood throughout," says Surly's webpage about the beer. "We’re never brewing it again, so it’s truly a whale. Brah." I managed to get extra bottles of last year's Airwaves, so maybe I can bag a second bottle later on.

This year we also got Beeginnings, a small (6.3oz) bottle of blackberry/raspberry/black currant mead (12% ABV) made with orange blossom honey. Three meaderies and a local homebrew club collaborated to make this clear, raspberry-colored gem and mead. There's also a small bottle of fruit puree (I got blood orange). Then there's a few stickers, a pen, two lip balms, a bottle opener, and some other small tchochke. On to the expo floor!
Weyermann's Axel Jany
Weyermann brought in Axel Jany from Germany to talk about the company and some of their products. He's a great speaker and quite entertaining. He passed around small samples of their various products so folks could do a little chew-testing. At then end, they gave away 10lb bags of a new floor-malted grain. They brought 100 bags, but there were way more than that at the demo. Yours truly missed out. Oh well.

I asked him afterwards what made floor-malted grain different (aside from the price). He chuckled and said there wasn't a huge difference. He said brewers were mainly interested in it for the "story:" It's how grain used to be malted, and some brewers want that old-school product. He said the Czechs can't get enough of it.

Later on I found myself at the Briess booth to get my free pound of Carapils Copper malt and to try some new (for me) varieties. I asked Bob Hansen how I could best use their Extra Special malt, and I got a 10-15 minute discourse on the various caramel malts and how Extra Special is different. The color in the Caremel malts is linear (1oz of Caramel 90 will give you the same color as 9oz of Caramel 10) but the flavors will be quite different. Extra Special is a 130L hybrid that has qualities of both caramel and dry malts. It's less roasty, and Bob said it would be excellent in an Irish stout like Beamish.

Then I got the lowdown on their CBW Rye, which I've used before and rather like. It was originally made for a customer to include in a beer kit, but Briess was later allowed to sell it separately. It's 20% rye with 10% Caramel 40 and 70% base malt (normally 2-row). Bob can talk your ear off, but that's enthusiasm for you. That's also why I come to these things.
Denny Conn, Marshall Schott, Drew Beechum
and Malcolm Frazier
After trying many tasty beers (Bent Paddle's amber ESB is fan-frickin-tastic!) I finally took in a seminar. The guys behind Brulosophy (Marshall Schott and Malcolm Frazier) and Experimental Brewing (Denny Conn and Drew Beechum) did a session on "citizen science" and their efforts to do experiments in the realm of homebrewing. It was a fun and enlightening session.

Then they said "dickchimp."
The "dickchimp" slide
Dickchimp is a verb meaning "to make a mistake, screw up." Denny hopes it will make it into the homebrew lexicon. I think we can make that happen.

Aside from being a hilarious word, the point was that you can learn a lot from your mistakes. Science involves a lot of mistakes, goofs and happy accidents. Also, YMMV: Your process may lead to different results than they got, so don't take their results as gospel.

I accumulated a lot of stuff on this day so I could spend more time in the seminars. The bag was almost full by the time I was done and boy were my arms tired.
Swag bag
And here's what I picked up:
The big contents
The flat stuff
This year seems to be the year for trucker hats. I was offered several, but politely took just one. Also, Spike Brewing is giving away a conical Friday and Saturday to someone wearing that bright green shirt. Guess what I'm wearing?

Surly's Omar Ansari gave the keynote speech. Very entertaining and passionate guy. After some good stories about him building hs brewery (and giving himself carbon monoxide poisoning in the process) he ended with a call to promote and protect craft beer.

The beer they poured was also tasty, but I have no idea what it was. Guessing a Surly brew. Maybe the commemorative beer?

Next time - Day 2.

Thursday, June 15, 2017

HomebrewCon 2017: Prologue

I'm attending the 2017 National Homebrewer's Conference (aka HomebrewCon) in Minneapolis this week. I was sitting on a bunch of airline miles and hotel points, so why not? 😁
I flew in on Wednesday to give myself a little time to explore a new city... and drink its beer. I'm not going to write a blow-by-blow travelogue here. I'll keep it something akin to long-winded tweets on a page.
After checking in to the Hilton Minneapolis, I followed a tip from my Lyft driver and hit a place called Hell's Kitchen for lunch. Their marquee item is a cheese-filled burger called the Juicy Lucifer. It's tough to eat such a thick patty, but it is delicious. The cole slaw was the real surprise with a true-to-theme spiciness to it.
Hell's Kitchen's Juicy Lucifer 
Practically next door is the Angel Food bakery. (They're at street level, while Hell's Kitchen is in the basement. The ironies were not lost on me.) The have an outpost at MSP and man their stuff looked fantastic. I hit them up this morning and got their crullers. Mmmmm. I didn't know crullers could be so airy.
Angel Food cinnamon sugar (L)
and plain cruller
Just across the street is Haskell's Wine. It's the closest liquor store for local beer purchases. Other stores probably have better beer selection, but being less than two blocks away wins out.
And just up the street from there is Target, the hometown big-box retailer. Perfect place to get some cheap lunchable-type food and B-complex to survive several days of drinking.
All this convenience is within two blocks of the hotel. I may never leave. Well, I would when winter comes.
The Minneapolis Convention Center is about two blocks away. It can be reached using the city's extensive Skywalk system of pedestrian corridors, but the weather up here is fantastic, so I might as well walk on the street.
I took the Hoppy Trolley's hop-on, hop-off shuttle to Near Northeast to hit some breweries up that way. It's $1/ride, which is a bargain at twice the price if you're leaving or returning to the Convention Center.
I hit 3 breweries: Able, 612 Brew and BauHaus. They weren't too busy so I managed to chat with some of the brewers. 612's rye IPA was fantastic (17% rye, per the brewer), and BauHaus's "belgo-american" ale was superb.
Last night I hoofed it up to Target Field to watch the Twins play the Mariners. The home team lost 6-4, but they do have a nice roomy stadium that feels very social.
The expo floor opens shortly, so I get to kill some time there while waiting for the first round of homebrewer seminars this afternoon.
Follow me on Twitter! I'm @Zymurginian
Cheers!