Sunday, April 22, 2018

Building a Brew Room - Lessons Learned

The brew room is done!

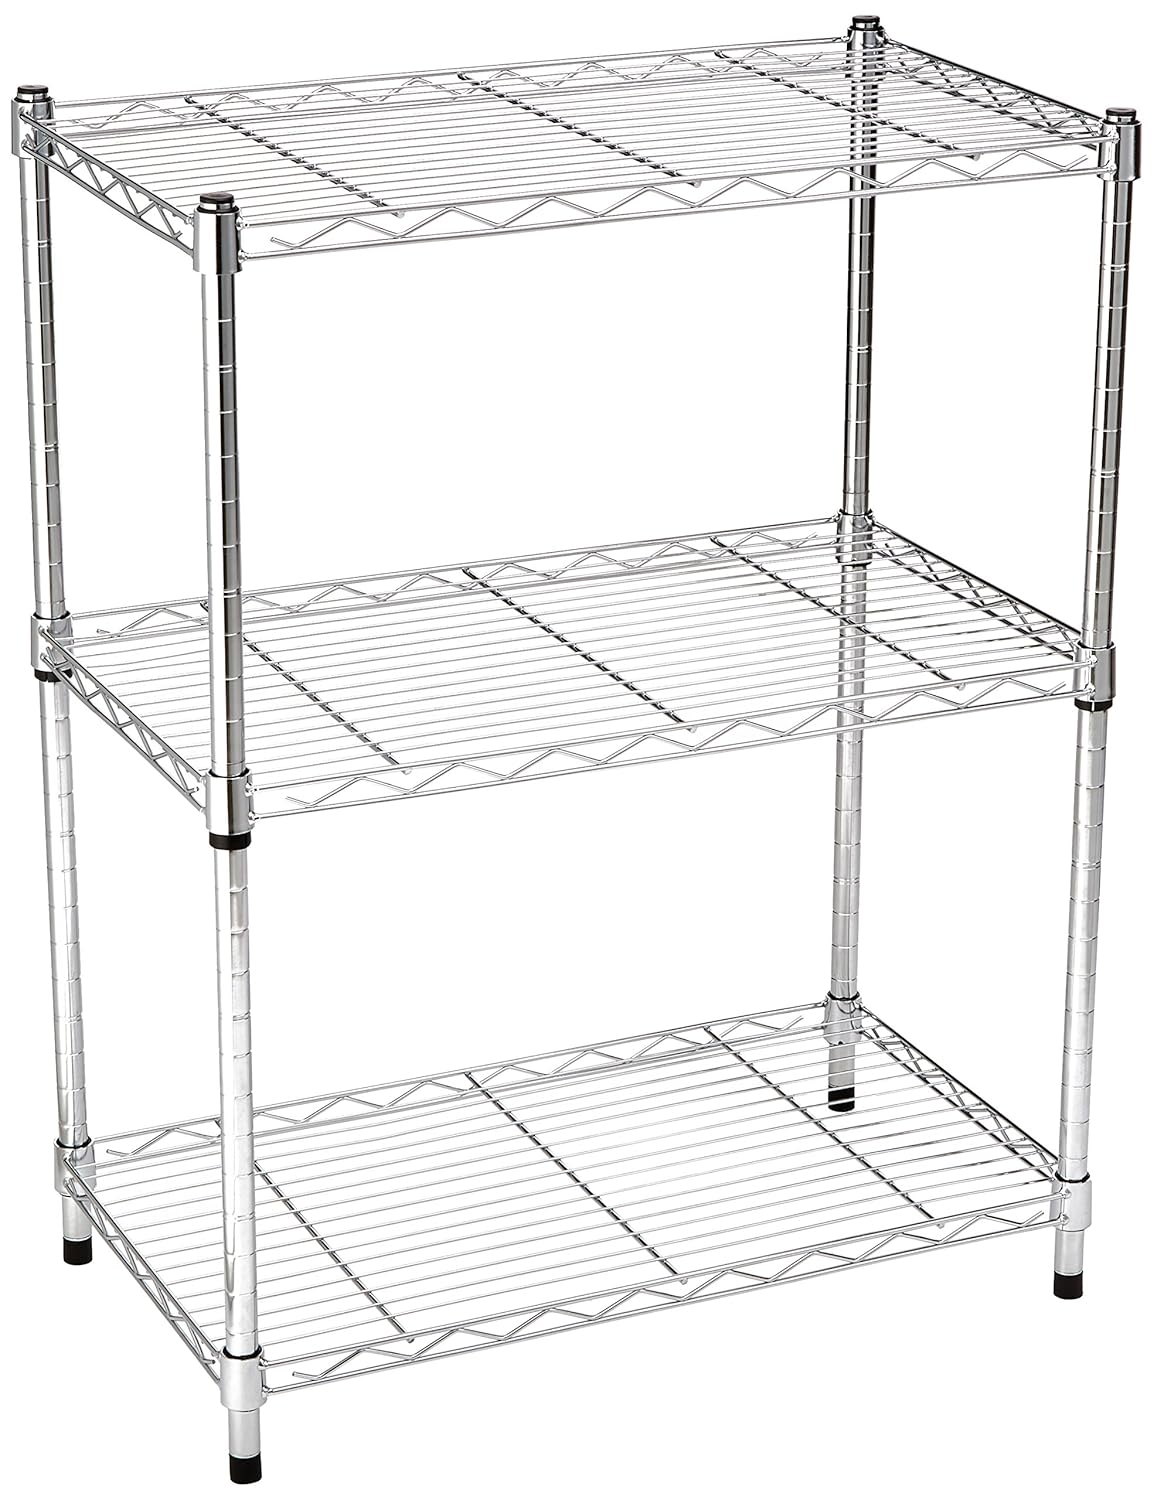
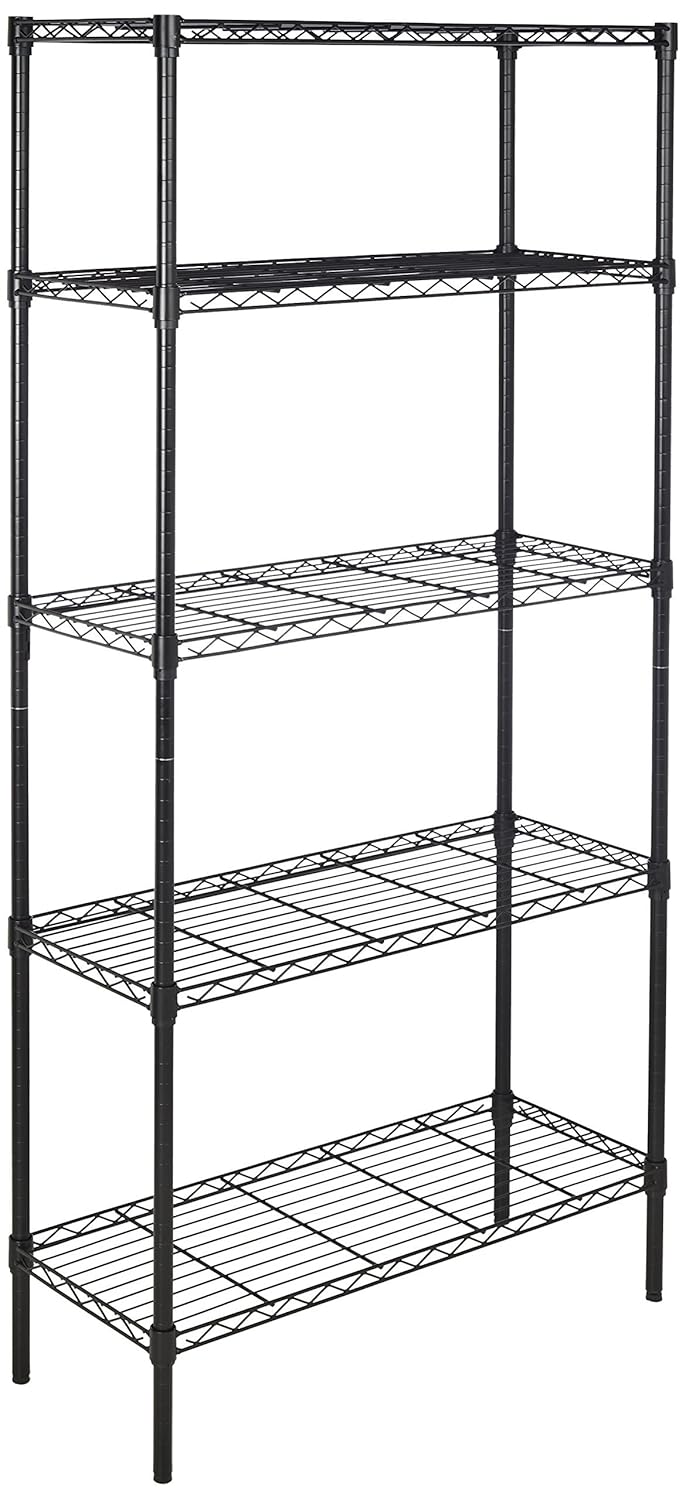
Vent hood and storage shelf

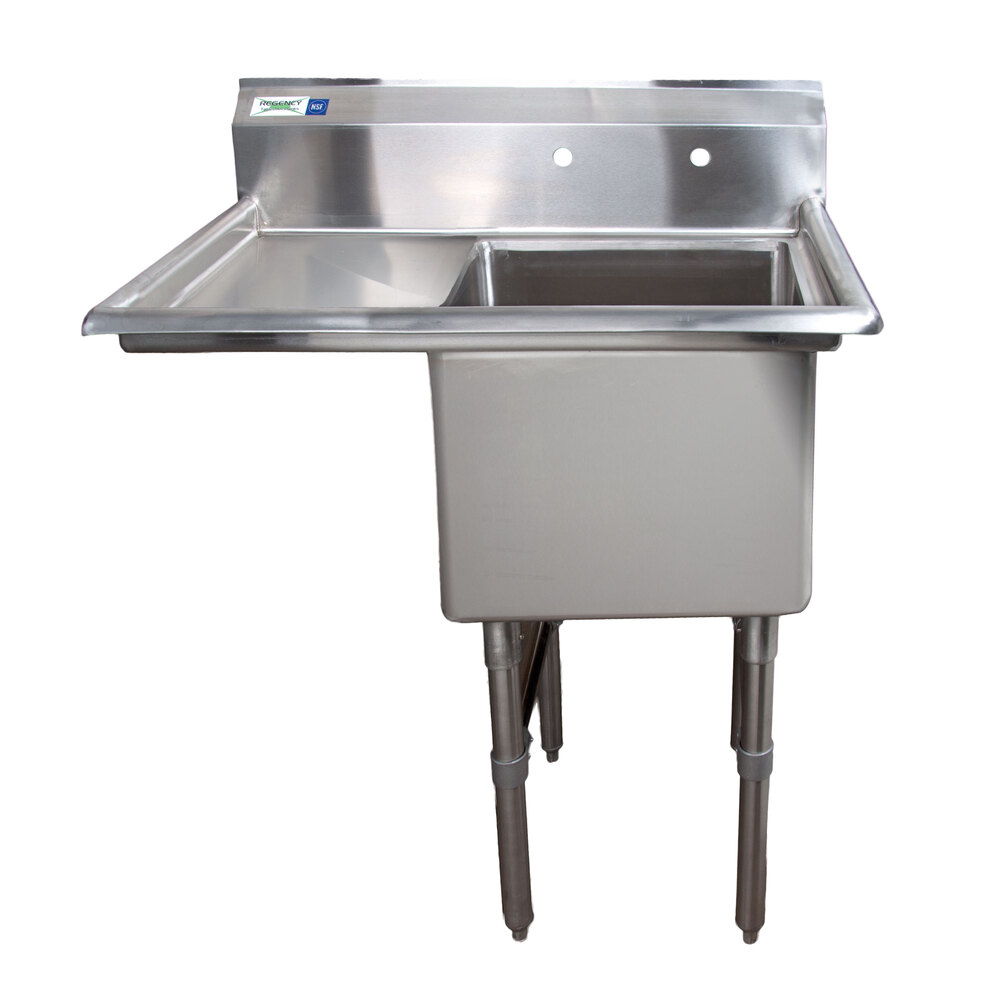
Fermentation chamber and sink with pegboard
No, it's not particularly neat, but it seemed about as tidy as it was going to get. 

Vent Hood

The contractors got the vent hood in, but come to find out that there's a minimum drop from the ceiling. As a result, the hood is a bit lower than I'd like (the controls are at about my eye level) but there's enough space between the hood and the table. 

One Table Too Many

Speaking of the tables... I bought two of them. After assembling one, I realized there really wasn't room for the other. Given that the hood is pretty much in the corner, I really couldn't fit the other table in without losing tabletop space or making it a tight squeeze near the hood. The other one went into the laundry room for folding. 

I had some 220V wiring moved from roughly where the ferm chamber is to the corner by the hood. Someday I plan to get a much more powerful induction burner and will need the extra voltage to make it happen.

Brew Sink

The sink went in with some difficulty. The plumbers had clearly never worked on a commercial sink before. They didn't install the 90-degree elbows behind the faucet, so they had to punch holes in the drywall to get the supply lines to make the bend. They also needed a ridiculous amount of pipe dope to make the connections. That got fixed tout suite. 

The drain really confused them. I ordered a drain that closes by moving a lever. This drain added a few inches to the bottom and made plumbing the trap tricky. The eventually figured it out, but the damn thing leaks. I left the sink half-filled with water to soak off some bottle labels. I came back several hours laters to a puddle on the floor. That's going on the warranty punch list. 

The faucet itself is .... meh. The aerator started rusting after about 2 months. More annoying is the cold-water valve. If I try to turn it on slowly - to fill a small glass with just a little bit of water - the valve makes a loud THUNK! and shuts off. Keep turning it and the water comes back on. It's a bother when I want a trickle of water. I guess its great if I'm trying to fill a mop bucket.

Pegboard

Seeing as I had a lot of free wall space around the sink, I installed a stainless-steel pot shelf up high and two Triton 22x18" white plastic pegboard panels in the corner. This would give me a place to hang tools and tubing. I also added a small Homak 12-drawer parts organizer to keep kegs parts at hand. The pegboard installed pretty easily when I used Triton's pegboard mounting kit. The anchors require a bit of drilling, but these pegboards aren't going anywhere.
Installed panel (left) and anchor
Unfortunately, the distance between the organizer's mounting holes didn't match the pegboard's spacing. I drove two screws into the board and basically hung the parts drawer on them. Not ideal, but it works.
Drawer unit resting on screws driven into pegboard

No More Brew Boxes

Previously, I kept a lot of my gear in two plastic totes: One for brew day (scale, thermometers, etc) and another for the kegs (wrenches, spare o-rings, etc.) I even wrote about making a brew day box a while back. Thing is, with the pegboard and parts drawers - nevermind a whole room dedicated to brewing - I really don't need the boxes anymore. Everything has a home now. 

Sunday, April 8, 2018

Turning a Danby Refrigerator into a Fermentation Chamber

After much renovation purging, the last thing I need is more stuff. Except for homebrewing gear. There's usually something I can justify owning. 😁

Danby DAR044A5BSLDD
The family started asking for a list of things I would like for Christmas. The list this year was short but very specific:

Put those two items together and you've got a fermentation chamber.

I picked this particular refrigerator because the evaporator is flat against the back of the interior. Most mini-fridges have the evaporator shaped into a "freezer" compartment on the ceiling. Not only does it take up needed space, it's tricky to move it out of the way without rupturing it. This Danby design also means there are no refrigerant lines in the top, so it's easy-peasy to drill a hole for a tap tower. If you're pressed for space, you could make this a kegerator/ferm chamber combo unit.

As for the Inkbird, it's an easy way to add temperature control without having to do any wiring. Set the temperatures you want, plug in the cooling and heating sources.

Modding the Fridge Interior


5gal and 2.5gal cornys (note the
can rack peeking into the right
side of the picture)
The fridge can be used without any permanent interior modifications but you will sacrifice some volume. This fridge has molded shelving on the inside of the door that takes up a fair amount of space, particularly the soda-can rack.

The most I could fit was a 5gal corny on the floor and perhaps two smaller cornys on the hump in the back. That rack won't allow for a second corny keg to sit on the floor. Smaller 2gal bucket fermenters fit easily.

More importantly, my 30L Spiedel fermenter and 6gal buckets won't fit without doing some cutting.

The molded door shelving looked like it could be cut away without too much difficulty. I found a YouTube video of a guy using a Dremel to cut along the outer edge. I had a Dremel somewhere, but didn't feel like digging it out. Also, noisy as hell. I figured I could brute force it with a utility knife and a screwdriver.

But to do that, I've got to get the door off.

Removing the Door


I started to take the plastic top off to get at the top hinge, but realized that would be more trouble than its worth. It was much easier to remove the bottom hinge instead. I gently rested the fridge on its back and removed the two screws holding it on. I was surprised that this fridge has only one adjustable foot on it, which makes it difficult to level. Once the bottom hinge plate was off, I slid the door off the top hinge.


Removing the Door Gasket


Removing the door gasket is simple. It more or less snaps into a channel that runs around the perimeter of the door. I peeled back one corner, then carefully lifted the gasket out. I placed it on a flat surface so it wouldn't warp while I worked.


 Cutting the Door Shelving


This part is probably the most dangerous. Not only am I working with a sharp knife, I'm trying to cut material that's tough and leaves sharp edges when cut. I wanted the gasket back to rest on plastic, so I was going to make my cut about 1/2" in from the gasket channel. The plastic makes a bend here, so there's an easy line to follow.

I started the cut by pushing the point of the utility knife into the plastic. I knew there was some foam insulation underneath, so I kept the blade short. It took some effort to make a cut in this material. I had to use both hands: one to pull the knife, while the other applied pressure to push the blade in and along the cut. The blade slipped out several times. The corners were particularly tricky since the plastic is thicker there.
Starting the cut

Working along the edge, about 1/2"
in from the gasket channel
Cutting the plastic is only half the job: The insulating foam fills all the voids underneath the plastic and is quite stiff, so that will need to be cut as well. I used a hacksaw-like blade to undercut the larger foam sections and peel the plastic and foam off the door.
Foam underneath shelving

Peeling away the lining and foam

After a while, I could peel away pieces of the molded plastic

Utility knife to cut plastic, small hacksaw to cut foam flush,
and pliers to lift and tear the plastic
After cutting the perimeter free, it's simply a matter of peeling away the plastic. It won't come off in one piece, so I made a few secondary cuts around the can shelving to make it easier. The edges are quite sharp, so wear gloves.

Door minus plastic shelving

Sealing the Foam Insulation


You could stop right here and reassemble the fridge. It will work just fine, but you run the risk of getting condensation into the door which can turn to mold and/or mildew. I've seen other builds use tape or a sheet of thin plexiglas to seal the inside of the door. Being a bit impatient, I wanted to use what I had on hand. So I used HVAC foil tape and a can of Flex Seal spray. I planned to use the Flex Seal to fill in the larger holes and provide an overall seal coat, then use the HVAC tape to cover the rougher cut surfaces. I emptied the whole can on this door in about 3 coats, then applied the tape. The tape is wider than the rough spots so it would make a good seal. It's not all that attractive, but hardly anyone is going to see it.

Applying Flex Seal

Applying HVAC tape

All done!
The last steps are to snap the door gasket back in place and rehang the door on its hinges.

Setting up the Inkbird


The Inkbird ITC-308 can control one cooling device (the fridge, in this case) and one heating device (a Ferm Wrap, which I bought later). You set the temperature you want to hold and how much wiggle room you will allow (hold at 65F, but allow to rise as far as 67F before cooling or drop to 63F before heating). You can also set a compressor delay so the refrigerator motor doesn't burn out from starting up too frequently.

I will eventually drill a small hole in the back left corner of the fridge to thread the temperature probe through, but for my first batch of lager, I just closed the door on the wire.

Once I had it set up, the Inkbird was pretty easy to use. It kicked the fridge on right when I wanted it to. Lagering was pretty easy. Fancier models can set a schedule to ramp temperatures up and down over several days, but it wasn't much trouble to make my changes manually.


Thursday, January 18, 2018

Gear Review: Fun With FLIR One

It's been cold enough to freeze the tail off a brass monkey here, so I was eager to see where we're losing heat in the house. In some places I can actually feel cold air seeping in, but other cold spots are less obvious. A thermal camera would be ideal, but I'm not shelling out $$ for one. But I can borrow one from the local library.

FLIR One for smartphones
(Photo: FLIR)
Arlington County maintains a "library of things" which includes gardening tools, American Girl dolls, board games, a GoPro, and a FLIR camera.

The county lends out several FLIR One cameras to promote energy conservation, but seeing as homebrewing is a temperature-sensitive hobby, it's somewhat useful there as well.

I checked out the Android camera for one week. It only took a few moments to install the FLIR One app on my phone. Once that was done, I was scanning away. I was impressed by its sensitivity. It was able to detect the warm air ducts underneath the floors and even my footprints on the cold floor. After I swept the inside and outside of the house looking for cold spots, I took it to the brew room.

Homebrew in Infrared

The FLIR confirmed what I already knew about the brew room: It's modestly insulated with a few minor cold spots where the exterior wall is breached. This time of year, it stays at around 60°F with no forced-air circulation. The poured-concrete floor acts like a giant heat sink, so I can ferment at ale temperatures for 8-9 months out of the year without any artificial cooling.

ESB in infrared
So what does beer look like to FLIR? I trained the camera on a batch of ESB in the Spiedel. The FLIR adjusts its sensitivity automatically depending on the levels of heat it registers, so even slight differences in temperature appear stark. The Spiedel looks like a warm blob, and you can even make out the level of the beer. It's practically incandescent in infrared.

I also have a small batch of lager fermenting in my new fermentation chamber (blog post coming soon!) and I tried to take a picture of that as well. While I could see the bucket visually, it was practically invisible in infrared. The inside of the chamber and the beer were both at 55°F. The only thing I could make out was the wire for the Inkbird's temperature probe. There was basically nothing to see, so I didn't even bother to snap a picture. That's actually a good thing.

Blanketed fermenter
I also took a picture of the Spiedel with its thermal blanket over it, which is just the thin Reflectix-like bag that my Blue Apron shipments come in. It's not a great insulator, but anything to slow down the cooling is a plus. It seems to be working. You can see the warm beer peeking out below the bottom edge, but it's cooler everywhere else. Incidentally, that warm spot in the middle is me: the blanket is reflecting back my IR signature.

I have a FermWrap hooked up to my other Inkbird and the temperature set to 65°F with a 1°F heat differential (meaning it will kick on at 64°F). With the blanket, it takes several hours for the batch to cool down to 64°F, so it's doing its job.

Verdict: Useful to rent or borrow, but don't buy

The FLIR One is a neat little tool. It's not worth buying for most homebrewers, except for those that have $200 burning a hole in their pockets. But if you can borrow or rent one, it will be very useful to check the efficiency of a keezer build or fermentation chamber.

Sunday, December 10, 2017

Aging Beer The Wrong-ish Way

A home renovation put the brakes on my homebrewing for several months, save for one small batch I made for a club competition. I'd get my own dedicated brew space eventually, but I'd have to pack up everything. Normally, I would stash my kegs in a cool place, but the basement was my cool place and it was being gutted. The old beer fridge got the heave-ho, so I'd have to settle for room-temperature storage of my kegs as well as several bombers of high-ABV beers. Time and heat are the enemy of beer, so I had to be careful.

Cellaring Warm-ish

The de facto storage room was our upstairs study. While I could keep it reasonably dark, it was on an upper floor and south-facing, so it got well into the 70s F during the early-summer days. I wasn't too thrilled about it, but sadly I had no choice. I gave the kegs an extra hit of CO2 before storage as a buffer against slight leaks. Sure, they might be a little overcarbed, but that's easy to fix.

The basement was finished in about a month, so I moved the beer downstairs for somewhat cooler and more stable storage (upper 60s F). I gave the kegs a quick burp and all appeared to be holding pressure nicely. The contents still smelled like beer too, so I was confident the homebrew was doing OK.

Fast-forward to December. The brew room is functionally complete and I'm getting organized. I had three kegs of finished homebrew: a stronger Dead Guy clone, a pale ale and a mystery beer that wasn't labeled. I want to cool them down for sampling, but the new beer fridge won't fit 5gal kegs without removing all the shelves. I did say it was December, so outside they go.
Kegs in the snow
 After about 6 hours, I brought them it, hooked up a picnic tap and started sampling. How bad would these brews turn out to be?

The Dead Guy clone

This beer is an iteration on a Dead Guy clone I made for my wedding. The second anniversary brew was a bit stronger (8.2% ABV) and partial mash. It went from grain to keg in 20 days. When fresh, it was a bit boozy and had a raisiny character I didn't really care for.  This one would definitely benefit from aging, and it did.
Dead Guy clone +256 days
It poured pretty foamy at first, but a quick bleed settled it a bit. The color was still good. Not as clear as before, but the kegs had been disturbed so I wasn't worried. The boozy aroma was gone and the raisiny flavor was absent as well. I didn't detect any oxidation, but it seemed it was passed its prime. According to my brew logs, this beer was 256 days old - almost 8 months. It's peak had passed, but it was still drinkable and arguably better than it was on day 0.

Verdict: Keep it around for now, but its dump date is not far off.

Blonde Ale

The next brew was a blonde ale I brewed in April for a club competition. It was a partial mash with some rye and Nelson Sauvin hops. It would eventually be served at a summer picnic, so I went light: 4.8% ABV and roughly 20 IBUs. Grain to keg in 16 days, plus an additional 5 days of dry-hopping. 

This beer was great when fresh. It scored 41 points in the judging portion of the competition. My best score yet! But when the club-wide best-of-show rolled around 6 weeks later, it tasted noticeably different. The hops didn't pop like they did before. It finished in the middle of the pack. If it was this drastic after just a few weeks, I feared it would be undrinkable after a long cellaring.
Blonde Ale +212 days
The good news: It was still drinkable
The bad news: It was also past its prime

Carbonation was still pretty good after a short burping. This keg didn't have a lot left in it. It poured cloudy, and I can only presume that some lingering sediment was stirred up. The beer still had that vinous aroma Nelson Sauvin is known for. The flavor was more grapefruity, reminiscent of Citra, which is odd since I used Magnum as the bittering charge and a bit of Sorachi Ace at flameout. No oxidation or other off flavors detected. Nevertheless, storage had not been kind to this summer gem. 

Verdict: Dump. Not worth keeping the few pints left.

The Mystery Beer

The third keg wasn't labeled and felt about half full. I wasn't sure what I'd get when I opened the tap. Out came my base amber ale, a 5.5% ABV brew upon which I built my pumpkin-pie-spice ale. It's designed to be inoffensive, lightly hopped (~35 IBUs) and slightly malty so the added flavors stand out. It's a blank canvas; so much so that one judge in a competition said it wasn't bad, but it wasn't beer.
Base amber +296 days
This was made in late February, so it had spent 296 days in the keg. Carbonation and clarity were both good. Not a lot of aroma, but it still had a slight malty flavor. No oxidation or off flavors. Still boring. Not awful, but not at its prime either. 

Verdict: Keep for now. Might be good to cook with.

Conclusion: Colder is Better, But Time Will Always Win

Keeping beer cold is a no-brainer, but its not always possible. Beer can be - and often is - kept above serving temperature. Keeping it warm will accelerate aging. In the case of the Dead-Guy clone, that made for a better beer. If I make it again, I'll give it a few weeks of aging near room temperature. Nevertheless, too much of a good thing is often bad. All three brews are on a downward trajectory after many months of warm to slightly cool cellaring. Refrigeration would have certainly kept them longer, but degradation is inevitable.

Tuesday, July 25, 2017

Building a Brew Room - Equipment

Brewing at my house takes place in several rooms. I mash in the kitchen, boil outside on a screened-in deck (or in the kitchen if the Mrs is out of town), chill and clean in the laundry room, and cellar in the basement. My brew gear is also kept in the basement, so I wind up making a dozen or so trips up and down the stairs over the course of a brew day. It's a bit of a bother.

When the Mrs and I started talking about renovating the house, she floated the idea of converting a basement room into a brew room. We have a mostly finished basement with a guest suite, but the previous owners had converted the roughly 11'x6' bedroom into a pantry and auxiliary kitchen. 

Guest room turned pantry/cat hovel

Over time it also became the de facto cat room, where Cellar Cat's food and litter box lived. In the picture above, she's on the counter next to the fridge, likely horking down some Fancy Feast. Any cattiness in my beers is solely attributable to ... um, Simcoe!


The room already has a (too small) sink as well as 120V and 240V power supply, so it's not much of stretch to gut it and turn it into a proper brewing space. But first things first: We had to empty the basement. This meant that my brewing would have to be put on hold. All of my brew gear is piled up onto two shelving units in the upstairs home office, and the cold ingredients (hops, yeast, starters, etc) were crammed into a cooler. To be honest, I'm surprised I could fit as much in there as I did.

Brewery (and some camping gear)
in storage

Our renovation contractor's designers had never worked on a homebrew-specific space before, so they were quite eager to learn about homebrewing and what a functional brew space would require. I wanted commercial-grade (or at least commercial-ish) equipment and fixtures, but their preferred appliance and fixture supplier didn't carry anything I wanted at a reasonable price. (Much to the supplier's credit, they didn't want to sell me something at 3x the price that won't work any better than what I could buy from a big-box store.)

I wound up doing a lot of shopping on my own. It's a bit more work than just giving the builders a model number, but I'll get a quality product at a price I can stomach. Broan and Elkay make fantastic stuff, but the sink and hood will get used maybe 1-2x/month so spending $$$ on them isn't a good idea.

New Fixtures and Appliances

Exhaust Hood
I'm adding a range hood so I can boil indoors on an induction burner. Curiously, the previous owners put in an electric range, but no exhaust hood. I bought the AKDY RH-0228, which sports a 3-speed 400CFM exhaust fan (so the Mrs won't complain about the house smelling like a brewery) and 2 halogen lights (so I can see what I'm doing).  This cost me about $250 at a well-known do-it-yourself retailer.
AKDY RH-0228 range hood
Sink
The two-basin kitchen sink is being replaced with a Regency stainless steel commercial sink. It has a 14" deep basin and is wide enough to accommodate the Mark II keg and carboy washer. The drainboard is a handy place for, well, draining things. 

Regency 600S1181818 LFT
(photo: Webstaurantstore.com)
I also bought a 8" wall-mount faucet and a twist-activated drain. One of those long dangly spray nozzles (like you see in a restaurant kitchen) would've been cool for rinsing fermenters and kegs, but probably not necessary. I also plan to put up a plastic pegboard above the sink so I can hang tubing up to dry.

Work Surfaces

For now, I have two Seville Classics stainless steel work tables. The tops are NSF certified, and the shelf is adjustable, much like the baker's racks I already have. (More on those later.)
Seville Classics Commercial NSF Stainless Steel Top Worktable
(Photo: Amazon.com)

I'd been tracking the price on CamelCamelCamel for a while. When the price hit an all-time low, I pulled the trigger. They're still in boxes, but I'm eager to get them set up. One will probably be the home for the induction burner, leaving the other for ingredient prep.

Baker's Racks

I have two racks currently: A tall one (5 shelves, ~6' high) and a short one (3 shelves, ~3' high). I bought them at Target some years ago, but Amazon has similar ones at pretty good prices. I plan to use the tall one for grain and ingredient storage. The shorter one might well go next to the sink for cleaning supplies.

3-shelf baker's rack
(Photo: Amazon.com)
5-shelf baker's rack
(Photo: Amazon.com)
These racks are pretty easy to assemble - the racks slide down the posts and are held in place by a plastic wedge-like stopper - but a bear to take apart. Gravity definitely works against you if it's standing up.

Fridge / Fermentation Chamber

I have long been wanting a fermentation chamber. A small dorm-sized fridge would be ideal, but most have a freezer compartment that takes up much-needed space at the top. More than a few people have tried to bend the compartment out of the way... and failed. The freezer is actually the evaporation coil, and handling it roughly will crack it. The refrigerant leaks out, and you're left with an expensive upright cooler.

Fortunately, someone already makes a refrigerator with the evaporation coil helpfully out of the way. The Danby DAR044A4WDD Compact All Refrigerator is exactly what it says on the box. The condenser runs down the back wall, maximizing interior space. Cut out the soda-can rack in the door and you've got enough room for a fermenter or a couple of kegs.

Danby DAR044A4WDD interior
(Photo: Amazon.com)
I've been tracking this model on CamelCamelCamel for some time. The price is pretty good currently, but I don't have a place to put it yet. I might well get a second one to store hops, yeast, etc.

Other Stuff TBD

There's still more stuff to get, but I still haven't decided what. A few things on my radar:
  • A stool or chair
  • Hooking up a small old LCD TV to cable or Chromecast
  • Amazon Echo Dot
  • A stand for my notebook computer

Sunday, June 18, 2017

HomebrewCon 2017: The Last Day

It's over.

It's finally over.

Now I can dry out.

The last day was a bit of a scamper, with two seminars to hit before one last pass at the expo floor. Then there's acquiring some of the finest liquid souvenirs from the nearest liquor store. Oh, and I had to buy and mail a Father's Day card. No pressure.

The first seminar was "Recipe Development with Dangerous Man" and their three brewers, Alxndr Jones, John Leingang and Rob Miller. It was alright. They discussed how they, well, came up with recipes. Early on, it was a lot of trial and error. Their first batch of rye beer gummed up their mash tun, so maybe 40% is too much.

The next session was "Kinda Brown, Mostly Sexy: A Semi-autobiographical Account of the Actual History and Brewing of Porters and Stouts" presented by Kris England. He's head brewer at Bent Brewstillery in town and - perhaps more importantly - a BJCP Grand Master IV judge and co-author of the BJCP 2015 Guidelines. He's also a gonzo dresser. It's hard to make out in the picture, but he's wearing a blue blazer with white stars, red trousers and black wellies with a floral pattern.
Kris England, dressed to kill you with laughter
Kris said right off the bat that he's highly caffeinated, but he learned in grad school that people won't pay attention to your lectures if you're boring. "Delivery beats content," he said. And he's right.

He went over the history of stouts and porters while occasionally badgering his friends in the audience and imploring us to drink more of the beer. (Speaking of which, he was kind enough to say at the very beginning what the beers were - Bent's Nicked and Schell's Stag Series #10 Tropical Stout - so we can get our Untapped check-ins out of the way.)

If you're a AHA member, this is one of the seminar recordings you need to watch. It's simply that good.
On a completely unrelated note, I thought this shirt in the audience was hilarious:

I darted to the expo floor to meet some folks for a Northern Brewer giveaway. Everyone got one of four beer superhero trading cards in their bag. Form a superhero team and you got a small prize (a NB logo tasting glass) and entry into a drawing for a $250 gift card and a $1000 gift card. As it turns out, forming teams was probably more trouble than most people wanted to bother with, so there weren't a lot of entries. They haven't called or e-mailed me yet, so I'm guessing I didn't win. Oh well.

I nabbed some grain samples for the gang back at the homebrew shop. Then there's the pillaging of the leftover swag bags. If you want another pen or cleaner sample, this is the time.

I made it to the post office with less than two minutes to spare, and I had to jog several blocks to manage even that. On the way back to the hotel, I detoured to Haskell's ("The Wine People!") for some beer to take home. The selection at this downtown location wasn't great, but it had more than I could fit in a duffel bag.
Did all the beer, grain, hops, and tchochke fit? As they say up here, "You betcha!"

And that was how my second HomebrewCon went. Hard to say if it was better than Baltimore, but I'm definitely glad I went. Next year's event is a bit later in June in Portland. There's a beer city for you. I might even get the Mrs and the boy to fly out ... and find other things to do.

Meanwhile, it's back to the real world, and getting my home brewery space built!

Friday, June 16, 2017

HomebrewCon 2017: Day 2

Yet another day at HomebrewCon. After the swag-o-rama and dickchimping of Day 1, Day 2 was more about the seminars.

The nice thing about this conference is that all the seminars are recorded, and they are posted to the AHA website soon afterwards. For some time slots, I had four seminars I was interested in. Knowing I can watch them all later frees me to pick one that might have a good Q&A or - more importantly - accompanying beers.

First up was a session on using dry yeast for bottle conditioning by Jennifer Helber, who set up Boulevard Brewing's quality assurance lab back in the 1990s. I never thought to add dry yeast to finished beer, but damned if it isn't a good idea. Boulevard  filters out the first yeast, then adds a different yeast for conditioning. The new yeast also helps clean up diacetyl and other off flavors.

Next was a historical presentation on molasses beer. The presenter was Frank Clark from Colonial Williamsburg in Virginia. He has a particularly cool job in that he researches food from a historical standpoint and tries to replicate them. Seeing as he works for a colonial-era living museum, he researches and brews colonial-era beer. And wears period clothing.
Molasses beer was a combo of molasses, wheat bran and hops. As it turns out, molasses and liquid malt extract have the same PPG (1.036) so this was effectively the first partial-mash beer. What's old is new again. The beer itself is cloudy but pretty tasty.

Then we got all sciencey with Rahr Malting's hops wizard, Patti Aron.
Good info on past research into hops, how IBUs are calculated, how aging can actually make hops better, and why isomerized hops don't skunk easily. Also plenty of molecule diagrams, which made a bit of sense to a guy who managed a C in freshman chemistry.

Phew! Time for beer! Before long I found the line for the Dickie's booth. Someone at the Briess booth told me the day before that were giving away work shirts. Sure, why not?
It took a while (20 minutes?), but I walked away with a navy blue Dickie's short-sleeve shirt freshly pressed with my choice of patch. They only had XL shirts left by the time I got there, but that happens to be my size (and probably a third of all convention-goers). Score.

Quick break for lunch and then another seminar on how to evaluate your beer like a beer judge. Gordon Strong gave a great presentation, and there were two beers offered (Schell's Pils and Summit Extra Pale Ale) to practice sniffing and sipping. Who knew there were eight different ways to smell beer?
One last turn of the expo floor to see what's up. Yakima Valley Hops did a HomebrewCon promo using plinko. One-pound bags of pellet hops were $20, and you could get a discount (up to 50%) depending on where the puck landed. First try stuck on a peg about a third of the way up from the bottom.

"That means I get it for free, right?"

"Ha! Not quite. Try again."

This time it landed on 3, so 30% off or $14/lb. Not too shabby.  I picked Medusa, a recent hybrid of a neomexicanus variety that was unlike anything I had. And since I hit the peg (or, more likely, they wanted to unload it) the guy even threw in an opened bag of Loral that had been on the counter as a sample. It weighs about as much as the sealed bag, so I'll call it 2lbs for $14. I'll vacuum-seal and freeze the Loral when I get home, but at 10.2% alpha it will have enough punch for some autumn brews.

Friday's catch
After dinner I braved Club Night. Only one other guy (that I know of) is here from my club in VA, so this might be short. I managed about an hour and a half, trying a few tasty-looking beers. Props to clubs with Randalls and beer engines.
It's a pig. Bourbon barrel stout
comes out the butt tap. 

M.A.S.H. with an IPA line split in two.
One fed into the Randall. Very tasty.

SMASH with a pretty righteous
slide-in reefer unit converted to
a trailer.
I may have gotten a shot (actually a syringe) of Maker's Mark from a guy dressed like a doctor. He looked legit. :D