When the Mrs and I started talking about renovating the house, she floated the idea of converting a basement room into a brew room. We have a mostly finished basement with a guest suite, but the previous owners had converted the roughly 11'x6' bedroom into a pantry and auxiliary kitchen.
 |
| Guest room turned pantry/cat hovel |
Over time it also became the de facto cat room, where Cellar Cat's food and litter box lived. In the picture above, she's on the counter next to the fridge, likely horking down some Fancy Feast. Any cattiness in my beers is solely attributable to ... um, Simcoe!

The room already has a (too small) sink as well as 120V and 240V power supply, so it's not much of stretch to gut it and turn it into a proper brewing space. But first things first: We had to empty the basement. This meant that my brewing would have to be put on hold. All of my brew gear is piled up onto two shelving units in the upstairs home office, and the cold ingredients (hops, yeast, starters, etc) were crammed into a cooler. To be honest, I'm surprised I could fit as much in there as I did.
 |
| Brewery (and some camping gear) in storage |
Our renovation contractor's designers had never worked on a homebrew-specific space before, so they were quite eager to learn about homebrewing and what a functional brew space would require. I wanted commercial-grade (or at least commercial-ish) equipment and fixtures, but their preferred appliance and fixture supplier didn't carry anything I wanted at a reasonable price. (Much to the supplier's credit, they didn't want to sell me something at 3x the price that won't work any better than what I could buy from a big-box store.)
I wound up doing a lot of shopping on my own. It's a bit more work than just giving the builders a model number, but I'll get a quality product at a price I can stomach. Broan and Elkay make fantastic stuff, but the sink and hood will get used maybe 1-2x/month so spending $$$ on them isn't a good idea.
New Fixtures and Appliances
Exhaust Hood
I'm adding a range hood so I can boil indoors on an induction burner. Curiously, the previous owners put in an electric range, but no exhaust hood. I bought the AKDY RH-0228, which sports a 3-speed 400CFM exhaust fan (so the Mrs won't complain about the house smelling like a brewery) and 2 halogen lights (so I can see what I'm doing). This cost me about $250 at a well-known do-it-yourself retailer. |
| AKDY RH-0228 range hood |
The two-basin kitchen sink is being replaced with a Regency stainless steel commercial sink. It has a 14" deep basin and is wide enough to accommodate the Mark II keg and carboy washer. The drainboard is a handy place for, well, draining things.
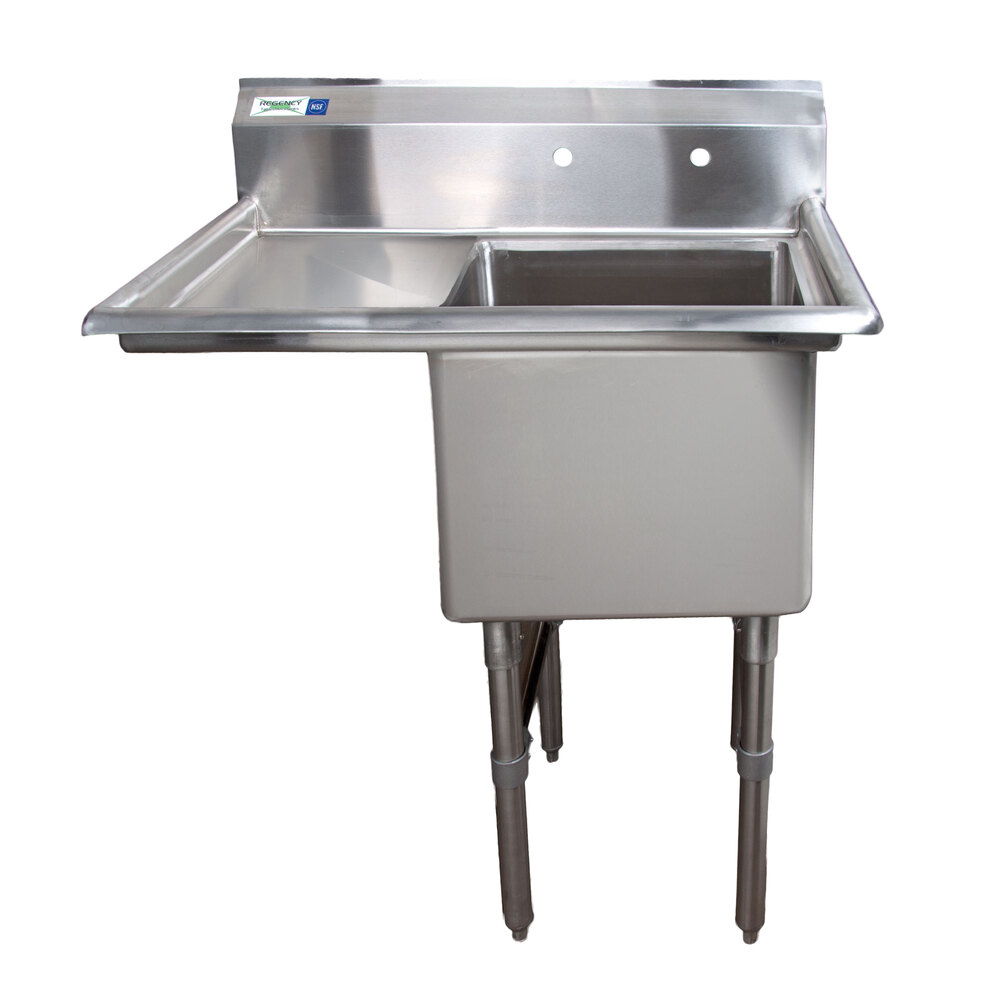 |
| Regency 600S1181818 LFT (photo: Webstaurantstore.com) |
I also bought a 8" wall-mount faucet and a twist-activated drain. One of those long dangly spray nozzles (like you see in a restaurant kitchen) would've been cool for rinsing fermenters and kegs, but probably not necessary. I also plan to put up a plastic pegboard above the sink so I can hang tubing up to dry.
Work Surfaces
For now, I have two Seville Classics stainless steel work tables. The tops are NSF certified, and the shelf is adjustable, much like the baker's racks I already have. (More on those later.)
I'd been tracking the price on CamelCamelCamel for a while. When the price hit an all-time low, I pulled the trigger. They're still in boxes, but I'm eager to get them set up. One will probably be the home for the induction burner, leaving the other for ingredient prep.
Baker's Racks
I have two racks currently: A tall one (5 shelves, ~6' high) and a short one (3 shelves, ~3' high). I bought them at Target some years ago, but Amazon has similar ones at pretty good prices. I plan to use the tall one for grain and ingredient storage. The shorter one might well go next to the sink for cleaning supplies.
These racks are pretty easy to assemble - the racks slide down the posts and are held in place by a plastic wedge-like stopper - but a bear to take apart. Gravity definitely works against you if it's standing up.
Fridge / Fermentation Chamber
I have long been wanting a fermentation chamber. A small dorm-sized fridge would be ideal, but most have a freezer compartment that takes up much-needed space at the top. More than a few people have tried to bend the compartment out of the way... and failed. The freezer is actually the evaporation coil, and handling it roughly will crack it. The refrigerant leaks out, and you're left with an expensive upright cooler.
Fortunately, someone already makes a refrigerator with the evaporation coil helpfully out of the way. The Danby DAR044A4WDD Compact All Refrigerator is exactly what it says on the box. The condenser runs down the back wall, maximizing interior space. Cut out the soda-can rack in the door and you've got enough room for a fermenter or a couple of kegs.
I've been tracking this model on CamelCamelCamel for some time. The price is pretty good currently, but I don't have a place to put it yet. I might well get a second one to store hops, yeast, etc.
Other Stuff TBD
There's still more stuff to get, but I still haven't decided what. A few things on my radar:
Work Surfaces
For now, I have two Seville Classics stainless steel work tables. The tops are NSF certified, and the shelf is adjustable, much like the baker's racks I already have. (More on those later.)
 |
| Seville Classics Commercial NSF Stainless Steel Top Worktable (Photo: Amazon.com) |
I'd been tracking the price on CamelCamelCamel for a while. When the price hit an all-time low, I pulled the trigger. They're still in boxes, but I'm eager to get them set up. One will probably be the home for the induction burner, leaving the other for ingredient prep.
Baker's Racks
I have two racks currently: A tall one (5 shelves, ~6' high) and a short one (3 shelves, ~3' high). I bought them at Target some years ago, but Amazon has similar ones at pretty good prices. I plan to use the tall one for grain and ingredient storage. The shorter one might well go next to the sink for cleaning supplies.
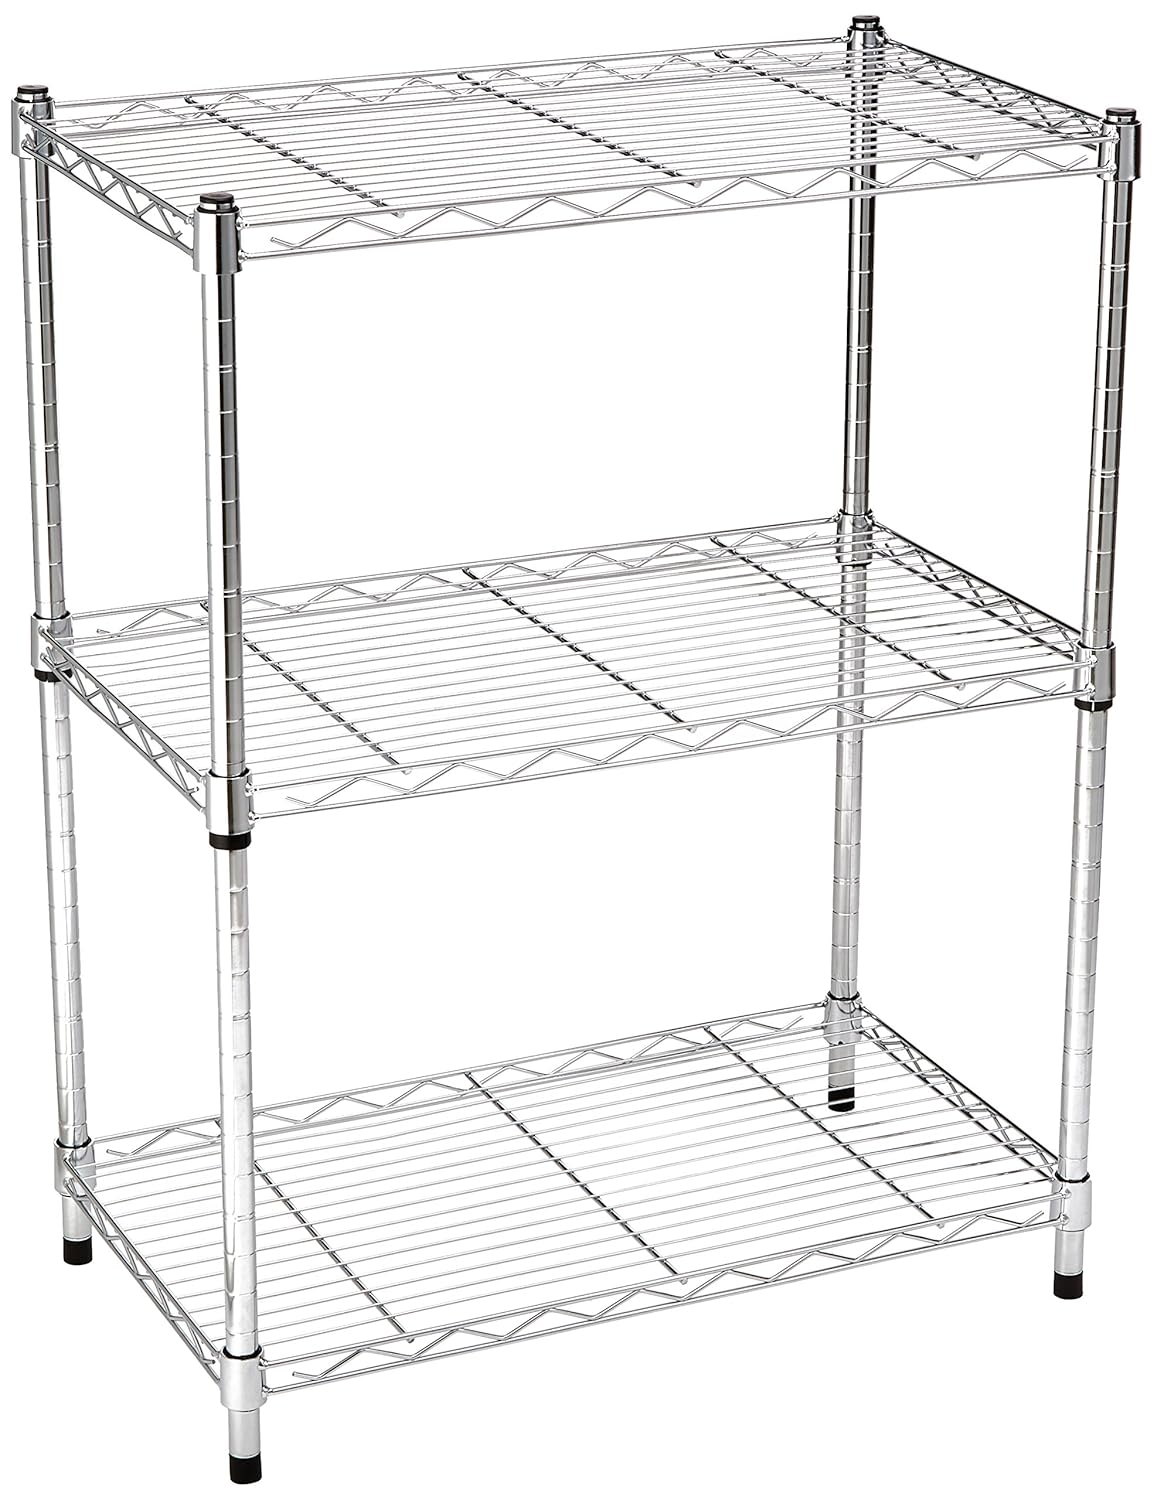 |
| 3-shelf baker's rack (Photo: Amazon.com) |
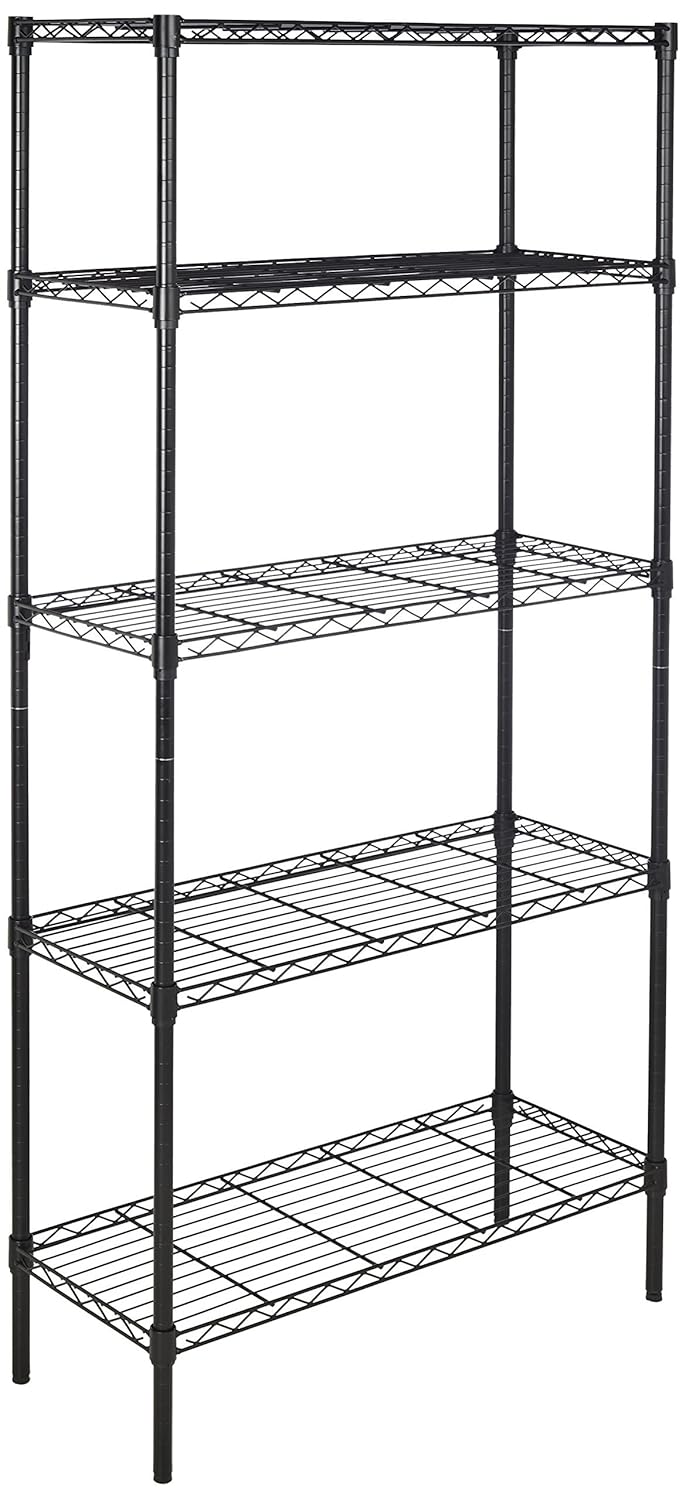 |
| 5-shelf baker's rack (Photo: Amazon.com) |
Fridge / Fermentation Chamber
I have long been wanting a fermentation chamber. A small dorm-sized fridge would be ideal, but most have a freezer compartment that takes up much-needed space at the top. More than a few people have tried to bend the compartment out of the way... and failed. The freezer is actually the evaporation coil, and handling it roughly will crack it. The refrigerant leaks out, and you're left with an expensive upright cooler.
Fortunately, someone already makes a refrigerator with the evaporation coil helpfully out of the way. The Danby DAR044A4WDD Compact All Refrigerator is exactly what it says on the box. The condenser runs down the back wall, maximizing interior space. Cut out the soda-can rack in the door and you've got enough room for a fermenter or a couple of kegs.
 |
| Danby DAR044A4WDD interior (Photo: Amazon.com) |
Other Stuff TBD
There's still more stuff to get, but I still haven't decided what. A few things on my radar:
- A stool or chair
- Hooking up a small old LCD TV to cable or Chromecast
- Amazon Echo Dot
- A stand for my notebook computer